Sunday, September 23, 2018

Translucency and Air Dry Paints

I am just going to put this out there because I know many of you are using various acrylic air dry paints to paint your babies.

I have recently read a statement about a particular air dry paint brand that is boasting that it is the only paint that gives a translucent skin tone. Comparison is being made as a form of promotion with statements like "unlike other paint, air dry paint and off the shelf paint, it is translucent." I want to refute this statement by saying that it IS quite possible to get nice translucent skin tones with several brands of air dry paints made for reborn dolls as well as artist grade paints to which are being referred to as "off the shelf paints". The inability to get a translucent skin tone is both due to user error and choice of paint colors.

To test the above statement, I purchased this new brand of paints called Ultimate Fusion to try for myself.  They are very translucent indeed.  They are thinned with only water according to their directions.  Based on my experience and extensive research, I have found that water breaks down the binders in paints and thus too much water dilution can lead to color fading.  Not knowing exactly what is in these or how much binder is in them I cannot say for sure what the max water load limit would be to thin these.   I did find issues with the paints not sticking well in spots on the vinyl when unprimed per their instructions.  There is also no statement of light fastness testing  or guarantee included with the paints.   

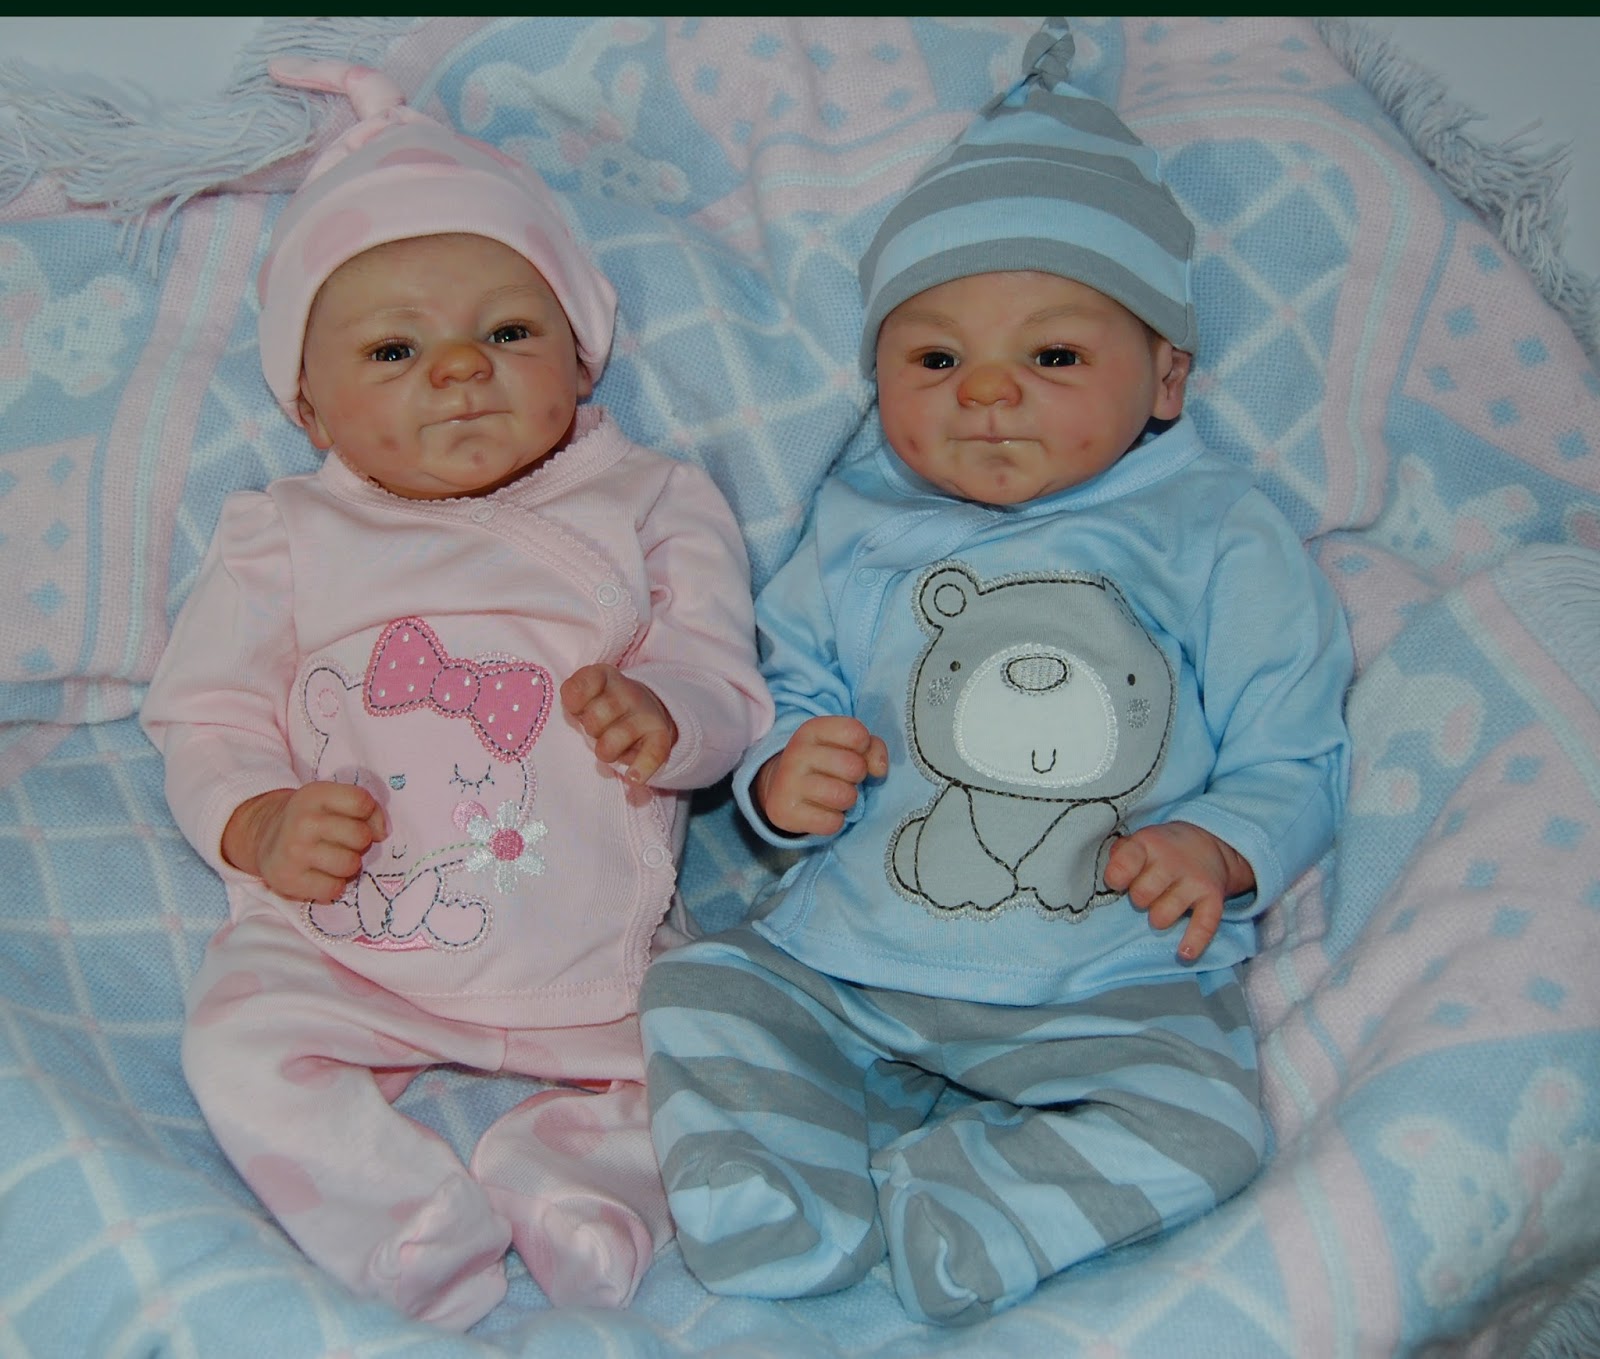
My first try with these paints did not go so well due to the paints not sticking well and looking blotchy.  I tried a 2nd time and was able to produce a nice baby using colors similar to what I would teach in a beginner's class.  I did not find the baby to be any more translucent in final product than my other paints I have been using.    I have taken these photos to show the comparison.  The baby's head and limbs are painted with Ultimate Fusion paints.  The belly plate laying next to the kit here was painted solely with RebornFX paints in my summer ID&TS air dry class I taught.   As you can see, the two are exactly alike in both coloring and translucency. 

What is my final verdict?  I would say the Ultimate Fusion paints do not have the test of time by the average user or documented research of permanence available to guarantee their long term durability.  Only time will tell about this aspect.  They are also very expensive for what you get.  They do produce a very translucent finish.  They are appealing for the novice/beginner who likes the idea of using only water to mix them up.  I did find there can be issues with adhesion at times painting on unprimed vinyl.  Their mediums in the kit consisted of BlendFlow which appeared to be a type of retarder/slow dry and Shine Remover which I found made my kit shiny when I applied it all over.  I have since learned their Shine Remover is the same product that was sold under the Miracle Blend label for this and I know many had issues with it leaving sheen under that label as well.  Overall, I did not prefer these paints.  I know many others who are thrilled with them.  It is like everything else, a matter of preference and user compatibility. 


Sunday, April 1, 2018

Happy Easter and Discussing PanPastels

In this hour I chat about PanPastels and show you the colors I most use. I also clarify the techniques for using the PanPastels and discuss some of the mistakes people can make with them. This was a live airing on Facebook and there are a few blurps where there was some interference in the connection. It does clear up and continue on pretty quickly.


Thursday, March 1, 2018

Welcome to 2018!!!!

Hello to all my peeps!  I am sorry I have not posted here in a while!  I got very busy during the holidays and new year.  I have been working on custom ordered babies, teaching air dry painting classes, working my day job and all the usual family stuff.   I often find it has been easier to set down and make a quick live Facebook video on my FB business page and then load it to Youtube so that is where a lot of my updates have been.   Be sure to go join my Youtube channel and check out some my recent videos about new exciting product and techniques I have been using, new kits and what is going on in my world.  Here is the link to the most recent one I have done.   I will sit down soon and write up some information here about the latest RebornFX products I have been using.  Also, anyone who wishes to take an air dry painting class from me, I will be teaching at IDTS in Florida on June 26&27.  Be sure to visit their website or mine to sign up for the class! 


 IDTS 2 -DAY WORKSHOP ON VINYL
REBORN DOLL PAINTING WITH
AIR DRY PAINTS AND PANPASTELS
TUES. & WED, JUNE 26 & 27, 2018
9:30 am to 5:00 pm each day
(1 hour lunch break)

Class Taught by reborn doll artist Angie Jones of Lil Dumplins Nursery
Since 2011, Angie has researched and tested many different brands of air-dry paints and air-dry mediums using them on vinyl dolls.  She has gained an extensive knowledge of how the vinyl reacts to these paints and mediums.  Since that time, she has been blogging about her findings and writing simple tutorials on air dry doll painting.   She has also been contacted by other artists and those selling air dry paints for vinyl dolls seeking advisement and instruction on the functional aspects of these products.  Angie has worked with local students, both one on one and in the class setting, to teach them how to effectively apply air dry paints onto vinyl reborn doll kits.

In this class, the student will be taught how to mix and apply RebornFX Air Dry paints on a vinyl reborn doll kit.  Class also covers priming the kit, creating blue under tones and veining, mottling, color blending, shading creases, and blushing.  I will also show students how to blend PanPastels pigment powders using them to color enhance their reborn doll kits then set them, so they can continue air dry painting. 
 Students will also be given instruction on at home final sealing of the paints once they are cured for 72 hours.
 Each student will take home their painted reborn doll kit with cloth body and a copy of class tutorial.

Items Provided In Class:
A Marita Winters kit with body & zip ties
Mottling Sponges and wedges
Use of RebornFX Air Dry paint set with Mediums and Sealers
Use of PanPastels pigment powders
Use of drying rack, paint pallet, rinse cup, paper towels etc.

Students will need to bring:
Paint Brushes – Size 0 liner brush, size 2 flat brush, 1-2 medium sized mop or round brushes (10-12) for mixing your paints, medium sized angle brush 3/8-5/8” and any other favorite brushes you like to use.
Poly fill, weighting materials & clothing if you wish to assemble your doll at the show.

COST
The cost of for this workshop is $295 per student.  There is a $145 non-refundable down payment due at registration.  (If class were to be canceled on my end for any reason this would be refunded).  The $150 balance is due no later than May 1, 2018.  Minimum class 5 students.  Maximum class 15 students.
Use drop down menu to pay class registration.
If you wish to pay via US postal money order, email lildumplins@gmail.com for further instruction.  

Paints Sponsored By Macpherson’s Arts and Crafts
Doll Kits Sponsored By Marita Winters


Friday, November 3, 2017

Christmas Special Babies!

THE BABIES IN THIS ALBUM ARE THE ONLY DOLLS I WILL OFFER 
AT SPECIAL PRICING FOR THIS CHRISTMAS SEASON. 

Each baby shown can be purchased for $300 shipped per baby in the US. Baby comes in outfit shown with magnetic paci, soft blanket, & extra outfit of my choice. Coco Malu sculpts come with Marx certificate. LE Naomi Pratt comes with COA. All babies come with Dumplins birth certificates. All babies are painted and sealed with RebornFX quality paints. Each baby has painted hair.
CLICK ON ANY PHOTO TO SEE IT LARGER.
TO PURCHASE GO TO:


Monday, October 23, 2017

Peachy Baby In Progress and Must Have RebornFX Color List

I have been hard at work in the nursery this week and weekend! I am in process of re-writing my Peachy Baby tutorial for use with RebornFX paints. Here is the baby in progress that I have been working on using the new RebornFX color matches to BabyFX.


The new RebornFX color matches to BabyFX popular colors work very well.  We made a few minute changes for the better on some of the colors:
Strawberry Skin and Carmel Skin have less white in them so you get more true color.
Olive Skin is slightly more green undertoned, making for a more true olive skin tone.
Bi-racial Brown has a less red undertone making it more neutral which should mean less needing to tone down with blue washes along the way. The rest are dead matches.

I also found that Pyrrole Red 2 is basically the same color as BabyFX Dark Crimson and can be used in its place.
Pyrrole Red Substitutes out very well for BabyFX Peachy Blush
Bluebell Wash has replaced my Blue Speck Mottle and produces pretty much the same results

Someone asked me this weekend to make them a list of my must have colors so here it is:

Must have RebornFX colors list:
Caramel Cream
Baby Flesh
Carmel Skin (this is a peach skin tone BabyFX color)
Sunkissed – BabyFX color match that is nice warm suntanned color
Yellow Ochre or Naturalise – I prefer the Naturalise-BabyFX color match as it has a slightly more brown tone to it and not as vibrant yellow as yellow Ochre but you can add brown to the Yellow Ochre to create the same if you prefer to just get that color.
Strawberry Skin – BabyFx color
Pyrrole Red 2 (This is a burgundy color)
Pyrrole Red 3 (this is the warm red we used in our last class)
Mottle and Blush – This is a BabyFX color match that is a true red. 
Ultra Marine Blue
Light Veins
Bluebell Wash
Thin Skin – BabyFX color match
S Berry Blush
S Berry Lips
Ash Brown or Neutral Brown
Black
Nail Tip
DKI Creases – if you do not feel comfortable mixing your own crease color

THERE ARE OTHER COLORS THAT YOU CAN GET LATER FOR ETHNICS AND VARIOUS SKIN TONES:

Bi-Racial Brown – BabyFX color
Olive Skin - BabyFX color
Hispanic Skin
Olive Shading – BabyFX color
Warm Wash
Warm Creases
Cherry Kisses – BabyFX color
Peaches and Cream Blush

MEDUMS YOU NEED: Order the larger 4 oz bottles because these go fast

Primer
Emulsion
Diluent
Matting Fluid
Open Time
Sealer – Tell them you want the new matte formula – it will be up on the website soon
Ultra Matte Varnish – New Formula will be up on website soon

Wednesday, October 18, 2017

New Color Matches in RebornFX Paints to Popular BabyFX Colors

I just wanted to share this exciting news for those of us who used BabyFX paints and are looking for replacement colors.
RebornFX now has new color matches to many of the popular BabyFX colors. So if you have my BabyFX Peachy Baby Color guide, you can use these colors with it. Shelley Marie has produced a fabulous looking baby using my tutorial and the new RebornFX color matches.


She said: Announcing New Colors in Rebornfx paints. Due to requests from former Babyfx paint users, we decided to produce some comparible pigment colors from the discontinued Babyfx paints into the Rebornfx air dry paint line. This will help reborners who have used or are still using the discontinued Babyfx paints to still have some of their favorite colors available in another air dry paint brand and eliminate the hassle and time consuming task of mixing your own.I had not tried the Babyfx paints, so I found these new colors interesting to use. The reborn doll picture is one I am currently working on using Angie Jones's Babyfx Peach Skin Tutorial. I found it easy to substitute the Babyfx colors in the tutorial with the Rebornfx paints.


This is Shelley Marie's baby she painted with these colors using my Color Guide. 

Tuesday, September 26, 2017

Lil Dumplins Nursery is LIVE!!!

I have purchased a new webcam and been playing around making live videos from my nursery.  Come join me for grins and giggles, info and fun!


Realborn Ashley Box Opening & Talking about DuraClear Ultra Matte Varnish

Reborn Doll Live Facebook Auction and Bidding/Buying Orientation


Lil Dumplins Nursery Unplugged

Friday, September 15, 2017

SUPER SALE ON SUMMER BABIES!!!! GREAT CHRISTMAS GIFTS FOR YOUR LOVED ONES!

Super Sale on Remaining Summer Babies!  Prices have been cut up  to $95 off of original pricing!!!!

To purchase any baby shown here go to http://lildumplins.webs.com/availablebabiesforsale.htm and click the Buy It Now button. I only ship to the US.

To see all the photos taken of each baby, go to my Facebook Page and look in the Photos section for each baby's photo album or look at the Shop section.
https://www.facebook.com/AngieJones2004/shop/?rt=19 


Dumplins JR™ Baby Sadie FOR SALE 
$199 with FREE US Shipping

 LE Nina Stoete $495 plus $30 USA shipping only
SUMMER SALE PRICE $400 PLUS $30 USA SHIPPING


Owen Frances with LLE girl belly plate
$475 plus $30 USA shipping only
 SUMMER SALE PRICE $400 PLUS $30 USA SHIPPING

Suu Kyi Stoete $350 plus $25 USA shipping only
SUMMER SALE PRICE $300 PLUS $25 USA SHIPPING

Sunday, August 20, 2017

Are You Looking For Cheap Drying Racks For Your Limbs While Painting?

I have a reborn doll air dry painting class I am teaching next Saturday and was trying to decide what to do about drying racks for the students.  I am on a very tight budget for this class to keep the cost down.   So here is the idea I came up with that we will be using.  I got these little wire shelves at the Dollar Tree.  You just flip them over and you have 4 pegs to dry limbs on.  The head can sit on its flange anywhere in the middle.  I have displayed some test limbs here to show you.  At only $1 each the students can take them home with them.  I thought this was a smart idea!


Friday, August 18, 2017

UPDATE: Testing Air Dry Sealers Again

Good Friday morning! It has been 3 days now since I applied the DuraClear Ultra Matte Varnish so today is follow-up day.  I have found that with most all the air dry varnishes I have used, 3 days (in GA humidity) is the cure time it takes to know how the varnish finish will look.  Pretty much all matte varnishes I have used will take on some sheen after the cure time and I find the 3 day test to be pretty accurate as to how much sheen the final finish will be.

My DuraClear Ultra Matte Varnish has dried to a matte finish with a slightly dewy look.  The dewy look is noticed when you turn the leg and the light hits it on the bony prominences, toes etc.  It does not have an appearance of shine.  It is a nice healthy glow.  I would like to point out that this leg is a Dolldreams Euro vinyl.  I find that this type Euro vinyl always holds a bit of sheen/dewy look that seems to come through pretty much any sealer I have used, including Genesis.  It is possible that this sealer might look a bit more flat matte on a China vinyl but I have not tried that to say for sure.  Here is the 3 day cured leg at 2 slightly different angles of light.


For comparison's sake,  here is a leg that I sealed over a week ago using a mix of DecoArt Media Soft Touch Varnish and corn starch following the formula I gave you in my last post.  It too has a very slight dewy reflection when the light hits the bony prominences.  It may overall be a tad more matte in finish.  It is a China vinyl though and I think that makes a difference.   Photos are the same leg at 2 slightly different angles of light. 


My analysis at this point is that the 2 finishes are very similar.  The DuraClear Ultra Matte Varnish requires no mixing so it seems to be a great option for ease of use.  The Soft Touch corn starch mix is more versatile in that you can decrease or slightly increase the amount of corn starch to the mix to alter your final finish results.  I suggest trying that on a test limb to find the mix that suits your preferences first.  

Both air dry sealing methods are nice to the touch, pass the squeezing test with no cracking and look good!  I find them both to be a win win! 

Tuesday, August 15, 2017

I Am Testing Air Dry Sealers Again!

It seems I am forever testing air dry sealers to try to find one I can truly recommend to you all that works!  I have found a couple options that I would like to share.

One of the brands of air dry sealers that a lot of artists favor is DecoArt Soft Touch Varnishes.  They make 2 lines of it and either one will work because they are exactly the same.  To verify this, I called DecoArt myself this morning and asked.  I was told that indeed they are the same formula.  To use it stir it in the jar first to be sure it is mixed well.  You can paint it onto a piece of porous car washing sponge and pounce onto the vinyl.  This will leave a dewy textured finish. 


If you prefer a more matte finish like I do, use the varnish with corn starch in this method:   20 drops distilled water, 2 level Dash Spoons (or 1/4 tsp.) Corn Starch + 1 level disposable plastic spoon (like you eat with at a picnic) of DecoArt or Americana Soft Touch Varnish.  Melt Corn Starch in water first then add the spoon of Varnish to it.  Can be apply with a dampened wedge for a thin layer that is totally smooth. Force dry with a hair dryer. Reapply a 2nd layer if so desired.   I used this method to seal this kit in progress.

While I was on the phone with DecoArt, the representative mentioned to me that if I were looking for a more matte varnish that would work well on the vinyl I should try their Americana DuraClear Ultra Matte varnish.  So of course, off to Michaels I go today and got a bottle to try.

I am very pleasantly surprised on first application.   I think this is a go.  It is different than other sealers.  It is not a flat powdery matte but it is matte.  It is hard to explain but as long as this does not take back on any sheen over the next few days it is good.  I do think that you have to go over the more shiny areas twice.  I did...on toes, ankle creases etc.  So if someone likes a really matte finish (like me), 2 coats are best.  However, it is easy to pounce on quickly and I force dried it with a hair dryer in a matter of seconds. 

I started with a leg that I primed this morning, then this afternoon I pounced on some red mottling using a medium that I knew would leave a sheen behind.  Then I forced dried that with a hair dryer and waited about 10 mins. then pounced on the sealer.  (So yes, the paint is uncured but I was in hurry and pushed the envelope a bit.) 


In this first photo, I am trying to show a contrast.  I did not apply the sealer on the thigh above the green line.  The leg had a definite sheen over all to start.  Then I pounced on the DuraClear Ultra matte from the green line down all the way from the knee to the toes.


So it is really hard to see in the pics the difference from the sealed part to the unsealed part but what you can notice is that all that area that I pounced sealer on is not shiny.  This is huge because usually what happens for me is I apply a matte sealer and end up with a vinyl that is way shinier than I started with.  

When you touch the dry leg, you can feel the sealer a little bit on the leg and tell it has some matting agent in it.  It has a bit more texture feel to the vinyl than the Soft Touch varnish does but it is more matte than Soft Touch varnish by itself.  However, it is not rough feeling to me as a whole.
I would say that SoftTouch varnish mixed with corn starch is a tad more flat matte than this DuraClear Ultra Matte.  Yet, for artists who do not want to mix something up, I think this will be a good flexible varnish that can be used straight from the bottle and looks matte. 

If the leg takes on more sheen in the days ahead I will let you all know but for now I am keeping my fingers crossed! 

Happy dolly painting! 

UPDATE 7:54 am 8/16/17   The sealer still looks matte. 😄

Friday, July 21, 2017

Balancing Primary Color Families and Custom Painted Baby Using RebornFX

Back in 2004, when I first started making reborn dolls, the painting methods everyone was using was to lay layers upon layers of white or flesh paint.  I can see why because many were working off of Berenguer dolls and such that had an orange viny tone and they were trying to neutralize it to be able to bring it round to something more neutral.   Once sculptors started making reborn doll kits there was some issues still with orange or very pink/red vinyls so this method of laying down flat coloring was still being used, along with mint washes and blue washes.    I noticed along the way that a lot of the dolls were lacking the glow of a natural skin tone.  As time went on, I begin to experiment with my own painting methods of usings various colors to build depth and life in the skin tone and reserving skin tone paints for minimal use as light washes to blend and tone coloring.   Over time I have perfected this method and this became my way of painting.   I have had customers continuously tell me over the years that my dolls have more color depth and life to them than many dolls they have purchased for hundreds dollars more than mine.   It has always been my pleasure to hear feedback from my customers how they love their babies!

A few years ago the reborn community started hearing a lot of talk about using a primaries method of painting or red/yellow/blue layering.  When I looked into what others were saying about this, I realized this was pretty much what I had already been doing for years!  No one had to teach me this, I already had my own method for doing it.  Mine is not a method of using soley primary red, yellow and blue.  However, I do use a variation of this, balancing these colors along with shades within these color families to produce a very lifelike skin tone that has depth and glow.

After advising people for years on the use of air dry paints and reborn doll coloring, I have decided to do some teaching.  On August 26, 2017, I will be teaching my first local Beginner's Painting class using RebornFX air dry paints.   I will be showing you how you can use my method of balancing color families and minimal colors to produce a very nice skin tone.

I have reborn several of these little Bountiful Baby Natalie kits now and I never get tired of her!  She is the perfect little baby for comfort therapy, kids and all collectors.   I painted her using the colors we will use in my upcoming class.     She is painted solely with RebornFX using my original method of balancing primary color families that I perfected years ago to get a nice glowy skin tone.

Here are some photos I took of her in her nakie state when she was finished.


My customer sent me this photos of her she took in her new home all dressed up.


Wednesday, June 21, 2017

Showing Off Nina and Talking A Little About RebornFX Paints

CLICK HERE TO SEE YOUTUBE VIDEO

In this video I show you my recently painted Nina by Adrie Stoete and I talk a little bit about the RebornFX paints.

IF YOU LIVE IN GA AND WOULD LIKE TO TAKE A CLASS

IF YOU LIVE IN GA AND WOULD LIKE TO TAKE A CLASS

For some time now I have been planning to start teaching local reborn doll painting classes using air dry paints. I would like to set up a class later this summer or early fall if we have enough participants. Costs to take my class would be based on the cost of supplies & space rental as well as how many people we have in the class. Keep in mind that reborn supplies alone can constitute a significant cost. If you are seriously interested in taking a class from me, please email lildumplins@gmail.com. It would be held in the Athens, GA area and you would be responsible for your own lodging if needed. We do have a nice Marriot Courtyard here nearby.

Tuesday, June 6, 2017

Answering some of your questions about RebornFX Air Dry Paints

As someone whe has been trying the RebornFX paints, I will share my experiences with the paints so far.

The biggest thing you will notice with these paints is that you do get some sheen as you paint with them due to the binders added to the paints. However, using the Matting Liquid either mixed in with the paints or applied as a pounced on layer ever so often helps immensely to knock the sheen down so that you can better judge how your skin tones are looking.

I found that using too much water with the premixed paints can cause the blushing colors and blues to lighten some over the course of 2-3 weeks. Using damp sponges, adding 2-3 drops water to mixes is fine but much more water than that and you may see some color lightening as it cures. The best thing to use to thin the paints is to use their Diluent and Open Time & Matting Liquid if you need those. If you do add any water, just adding one drop of the Emulsion will help to offset that in terms of adhesion. However, keep in mind the Emulsion can increase the sheen a bit. I have also found the Jo Sonjas retarder medium works well with these paints if you like to use it.

Their primer can leave a slightly sticky finish behind but as you paint it that gets better. It sorta depends on the vinyl. It does not do it on all of them. Applying a layer of the RebornFX Matting Liquid along the way seems to take away any stickiness for me. However, I am told that their primer does not work well at all on the very soft Dolldreams vinyl that are like silicone and goes very sticky. The person who contacted me with that issue asked me what I suggested and I said to try priming it with the Golden Fluid Matte Medium. She did and reported that it works very well. In fact, you can use the Golden Fluid Matting Medium to prime all your kits if you wish. I like it a lot.

Sealing: I REALLY like the RebornFX Sealer for 2 things. It is great to seal powders and can be thinned with a little water and put in a spray bottle for this if you wish. I just pounce it on straight with a wedge. The new formula is more matte and helps to reduce sheen as well. I bought the 4oz bottle of it as I use it a lot. It is meant to be applied before you use a varnish. They also say if you do not wish to use a varnish you can just apply 2 layers of this. I personally recommend some type of varnish so I have not tried using this alone. I apply Genesis Heat Set varnish over this after a couple days cure time and everything heat sets very well for me.

2 in 1 Sealer - this is their newest sealer that is meant to replace the 2 step process of their regular Sealer plus varnish. Honestly, I use their regular sealer after painting no matter what kind of final sealer I plan to end with because I find the matting properties of the regular sealer works well for me. Therefore, you CAN apply the 2 in 1 sealer over the regular Sealer. The 2 in 1 Sealer is not totally matte. It is not as much sheen as most air dry varnishes but it is very dewy. They recommend applying a layer of matting liquid over it when it dries if you want it more matted. I have not tried this yet because so far I have used the 2 in 1 sealer on hair only where I wanted a little sheen. I use Genesis for my varnish. I also find that the 2 in 1 sealer goes over the Genesis very well if I choose to paint hair after I have Genesis sealed my baby.

I tried using the 2 in 1 sealer as a primer and did not work well for me. I found the paints were not curing properly over the top of it and ended up stripping the baby. Not sure why unless it forms such a shield that it does not allow any moisture trapped between it and the paints to escape but it did not work. (When using it as a final sealer we would have allowed the paints to cure long enough that moisture has all escaped before sealing.) Use the RebornFX Primer or Golden Fluid Matte Medium I recommended as primer.

Here are some photos of nakie babies painted completely or predominently with RebornFX by me so that you can see the coloring well.


Saturday, April 29, 2017

Working on Owen Frances kit with more matted version of RebornFX products

Here is Owen Frances - Now Frances, in progress using the primaries method to start. My baby is painted with RebornFX paints in their newer version that are more matted. So far she only has 2 layers red, yellow ochre & blue mottled on her, blue veins and a layer of Pink Flesh skin tone (a RebornFX color I really like a lot). Obviously she is lacking depth right now as creases will come next. Once I have done that I will apply some warming color, maybe another blending color and a final blushing on palms/soles, cheeks etc.

I had to apply a layer of matting fluid after this to reduce sheen.  I can tell the new products are more matte but I think the fact that she started out with so much sheen from the primer I had used on her it was an uphill battle all the way.  I am of the notion that if you start out with a shiny base, the RebornFX paints have a hard time overcoming it.

Today I also primed a Levi kit using the RebornFX 2 in 1 sealer as a primer.  I will be curious to see if the Levi does better about not taking on sheen while being painted.  He is not nearly as shiny being primed with the 2 in 1 sealer nor does he feel tacky.

For the paint layers on Frances,  I mixed the new more matted formula RebornFX paints with the more matted Emulsion and RebornFX Diluent I had left from my initial paints set.  No water this time other than dampening the sponges.  I kept a damp sponge on hand to blot any excess color deposit.  I did not even use any Open Time in the mixes until the Pink Flesh layer.   I have to say for that layer I forgot and just grabbled my JO Sonjas Retarder and added it to the mix quickly because it was drying a bit pasty looking for me  and it worked fine after I added that.  The Retarder seems to help the flesh tone not to dry pasty looking and gives more working time so I could pounce it out more.  Open Time would probably have worked as well but I forgot I had gotten in some newer version of that too.

Anyways, here is baby so far